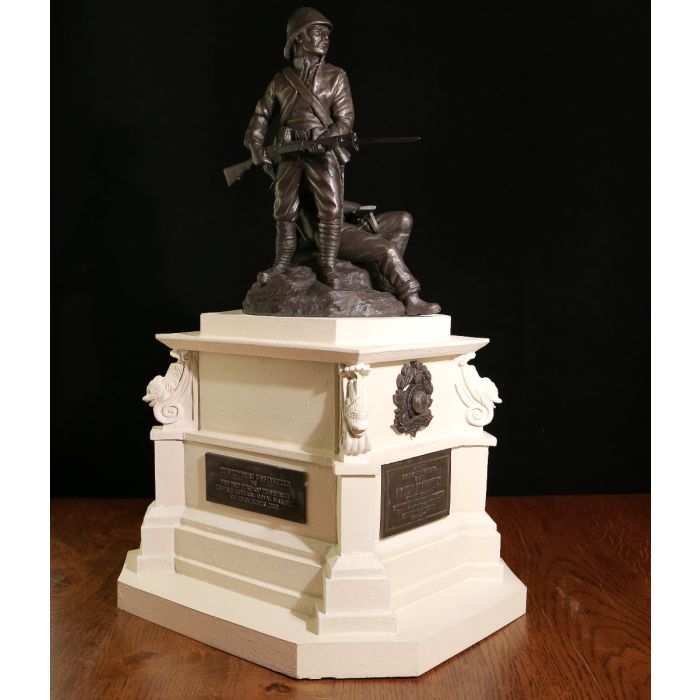
Royal Marines Graspan Memorial, The Mall, London
The Royal Marine National Graspan Memorial which stands in the Mall in the centre of London. Our sculpture stands 21" tall, 12" wide and 14" deep and is made of a 'Portland Stone' coloured base with 'bronze' plates.
THE GRASPAN MEMORIAL
Following the outbreak of the second Boer War in 1899 a Naval Brigade, formed from HM Ships Doris, Powerful and Monarch, was landed at Simonstown, South Africa. This brigade included the Royal Marines Light Infantry and Royal Marines Artillery Detachments from these ships, a total of 190 Officers and men, under the command of Major John Plumbe RMLI and organised as one RMA and two RMLI companies. The Brigade itself was under the command of Captain Prothero RN and it was sent, with its four naval guns, to join the force under Lord Methuen who had been given the task of breaking through the Boer lines to effect the relief of Kimberley.
The first action took place at Belmont where both the RMLI and particularly the RMA were used in a support role. After its capture, Lord Methuen realised that most of the enemy had withdrawn as his forces had attacked and were now in strength along a line of hills, the Graspan Kopjes or Heights, that straddled his line of advance. Not wanting a repeat of this situation, Methuen sent his cavalry around the heights to cut off the Boer's escape route. The Royal Artillery was given the navy's mules and the four naval guns were put on board a train. Two were later detrained, not enough men being available to operate any more, and supported the attack on Graspan. The infantry, supported by artillery, advanced on a very wide front across two miles of flat, featureless grassland that offered neither cover nor concealment. They had already been marching for more than three hours and breakfast had not been taken. At a distance of half a mile from the heights, with the Naval Brigade as the right flank with a company of Kings Own Yorkshire Light Infantry in support and a half battalion from the Royal North Lancasters in reserve, they came under vigorous fire. Scouts had estimated the Boer force at 400 but this was a gross underestimation. Methuen's attack was made just before midday with the sun at its hottest. As the infantry advanced, Methuen turned the direction of march of the Naval Brigade so that they were moving towards the most dominating feature of the Boer's defences. Realising that the infantry's general advance was merely a cover for the main attack by the Naval Brigade the Boer commander concentrated his forces to both directly oppose, and provide cross-fire against, the advancing naval force.
Although the barrage from the British artillery continuously fell on the crest of the hills the Boers were still able to pour a withering fire upon the advancing and exposed troops. The brigade commander, Captain Prothero, was wounded and his deputy killed whilst Major Plumbe RMLI and Captain Guy Senior, RMA also fell. Captain Alfred Marchant RMLI, as the most senior officer, assumed command of the Naval Brigade - the first time that a Royal Marine had held such a command for many years.
The final advance up the slopes consisted of a series of short rushes under independent fire - an automatic reaction in a situation where few Officers and NCOs survived but the men's training and discipline took effect. Major Lindley, surgeon to the Rimmington Guides said, “he was riveted to the spot at the sight of such magnificent, reckless courage, though bullets were falling thickly round him also”. As the marines and sailors reached the crest the Boer line broke and they retreated down the reverse slopes. Of the 190 Royal Marines who took part 86, or 45%, became casualties. This was probably the only time that a Naval Brigade had been employed in such a classic infantry role.
The Graspan Memorial became the Royal Marines National Memorial in 2000
In an effort to be more sustainable we've had our outer packaging redesigned to be fully recyclable. Every statue comes in a simple elegant printed brown box with printed fabric tape.
Inside the box the statue will be protected with bubble wrap and special foam bags to minimise the chance of damage in transit.

All our statues include an optional engraved plate on the wooden base. On the bronze statues the plate is jewellers brass and the pewter/ silver statues have a nickel silver plate.
To add a plate to your statue please select the option above and enter your engraving details. Please note if the engraving is left blank no plate will be included. If you'd like a blank plate please write this in the engraving details.
Please DOUBLE CHECK the engraving as mistakes will require a new plate to be made.
On the engraving the text will be centred and the font sized to fit the plate.
| Product Code | B77k |
|---|---|
| Price Code | FN |
| Sculpting Scale | 8" |
| Base Material of the Statue | Cold Cast Resin |
| Height Including Presentation Base | 21" / 53cm |
| Width with Presentation Base | 12" / 30cm |
| Depth with Presentation Base | 14" / 36cm |
| Weight | 16kg |
Please be aware that these measurements are not exact and have been rounded for ease.
As every item is individually handmade the exact dimensions may vary slighty.